CLICK HERE FOR FREE BLOGGER TEMPLATES, LINK BUTTONS AND MORE! »

Saturday, October 26, 2013

HIMCR - Use a Critter! #121

Hi, all my crafty friends and family!!!

Here it is the 4th Saturday of the month and do you know what that means?  It means it's time for another Hiding In My Craft Room challenge and since it's the 4th Saturday of the month, it means the challenge it a "Mix It Up" challenge . . . so this time we challenge you to use a Critter!  This can be a stamped image, a digi image, a cut out image, a die cut image . . . even a photo of your favorite "critter".  FUN, don't you think???  

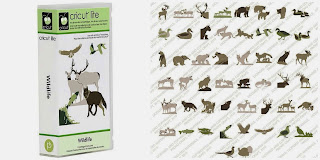
And this month, our most generous leader is giving away the following "Wildlife" Cricut cartridge"


I have to admit, I struggled with this challenge . . . mostly because I don't have many cuddly (in fact, I don't have any) critter images.  So I decided to use a spider for my project . . . actually, I did three (3) projects that I decided I would share all three (3) of them with you this week.  How's that for some inspiration?

My first project is a Halloween tag I did for a "just because" gift for a friend.  I cut the spider at my LSS using their AccuCut machine., did a little distressing, added some Snug Hug ribbon & cheesecloth, and some Dew Drops in orange and here's what I came up with:


Since my daughter is going to a Halloween party this weekend, I decided to get a headstart and do a Halloween layout.  So for my 2nd project, I once again used a spider (cut on my Cameo) along with some flowers cut on my Big Shot, added some ribbon and cheesecloth, and a little black drawing ing and here's what I came up with:


 Here's a closeup of the flower cluster with the spider:

And for my 3rd project, I thought I would share a pin I made for a pin swap I was in...I actually did 3 different pins because we had to send in sets of three (3) for each person and I was in both groups, so I had to do 14 sets.  Long story short, because of problems with my local PO, I ended up having to redo this pin three (3) times . . . that makes for a LOT of pins.  But I am really happy with the way they turned out.  And for those who wonder how to adhere or fasten your beads to you pin, I used E6000 adhesive . . . it is the BEST for this type of project.  Here's how it turned out:


 Here's a closeup of one of my pins in a project I did a couple of weeks ago.  
Click HERE if you would like to see the whole project.

Thanks so much for stopping by today . . . I hope to see you and your "Critter" projects up on HIMCR this week!!!

Oh, one more thing, if you are interested in winning a $20 gift certificate to VLVS (Viva Las Vegas Stamps) from ME, click HERE for more info (will be at the end of my October "VLVS Guest Designer-Halloween Tag" post).

Till the next time I'm up in the night.  Kathy

**Challenge(s) entered:
**NOTE:  As with most challenges, you need to have a separate post for each project (or one blog post=one entry) . . . .  So instead of creating several different posts, I am entering this post just ONCE per each challenge and putting which project I would like considered.

Always Something Creative - Halloween or Autumn (with most challenges, you need to have a separate blog post for each project entered.  So instead of creating several blog posts, I am choosing to enter just ONE project for this challenge -- the Happy Halloween tag with the spider -- Though I may change my mind after I ponder that a bit more. lol :))
Chocolate, Coffee & Cards Challenges - Bugs or Little Critters (I use tags as cards so I'm entering my Happy Halloween tag)
Crafty Boots - Halloween (tag)
Crafty 4 Eternity Recipe Challenge - Happy Halloween (entering the tag)
Heck of a Challenge - Autumn Colors (tag or layout, doesn't matter)
Feeling Crafty Challenge - Autumn or Autumn Colors (entering LAYOUT)
Paper Crafting Journey - Anything Goes (tag or layout, doesn't matter)
Sweet Stamps - Tags
Use it Tuesday - Creatures (diecut spider(s) for almost 3 years)
4 Crafty Girlz - Anything goes (am entering just the tag for this challenge)


Friday, October 25, 2013

VLVS Guest Designer - Halloween "tag"

Hi, all my crafty friends and family!!!  

As you may remember, I was asked a few months ago if I would like to be a Guest Designer in October for VLVS! (VivaLasVegas Stamps! and my first project went LIVE on October 11th. (click HERE if you would like to see it).  And since the last time I showed you a mixed media layout, so I thought I would show you a mixed media "tag". 

But before I go on, I want to let you know that I will once again be giving away a $20 gift certificate to VLVS.  Details will be at the end of this post . . . so stay tuned.

Back to my project --- Since I absolutely LOVE Halloween, I decided to combine the best of both worlds . . .mixed media and Halloween . . . a gigantic Halloween tag!!!  After a couple false starts, I finally got it together.  Here's how it turned out: . .


VLVS products used:
High Gloss Embossing Powder
Miracle Tape:

Other products:  Mischievous by MME, wood paper from MME, UmWowStudio October 2012 kit, chipboard, cardboard, plastic lid, block letters from Tim Holtz, Vintage Photo and Black Soot distress ink, gesso, orange glitter, Timeless, Taupe & Tattered Leather mists, geltos (banana & blood orange), black Pitt pen, sandal & latte alcohol inks, cheesecloth, misc. flowers & grass, Tim Holze bottles, misc. dictionary pages, and misc. bottle labels, 


For the base of my tag, I used 9-1/2"x12 chipboard and 2 pieces of the orange printed paper from Mischievous paper collection from MME and using the brick background stamp,  I embossed it with black ink and high gloss embossing powder from VLVS..  Tearing dictionary pages to various sizes,, I distressed them with distress inks and then glued three (3) them on each side of the tag (by folding them in 1/2 but not making a crease).  Using three (3) sprays (Timeless, Taupe & Tattered Leather), I,sprayed around the tag. I also sprayed some misc. pieces of cardboard and using glossy accents, put glitter on my lid . . . then adhered to my tag along with the cardboard pieces..I also colored my stamped image and adhered it above the lid.


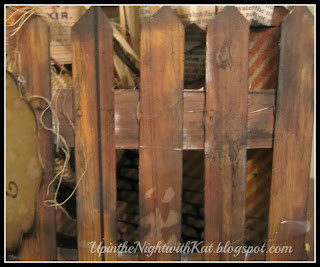
I used some wood paper and made my fence.  But since I didn't like the color, I used Sandal and Latte alcohol inks and changed the color. Once it was dry, I adhered it on each side of the tag so it would bow out.


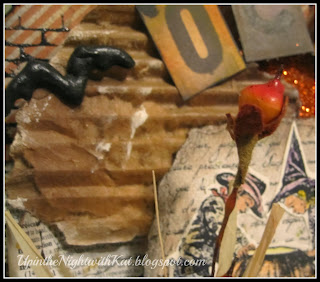
I fussy cut "O-C-T-O-B-E-R" from the block letters and used my geltos on them to help them match my tag a bit better.  Using a glue gun, I adhered the letters to the outside edge of my lid.  I also glued bats in three (3) places.


I stamped my Kids with Giant Jack 'o Lantern stamp on to cream colored paper and colored it with my watercolor pencils.  Then I fussy cut it out and glued it to a piece of script paper.  Then tearing about 1/2" to 1" all around my image, I then distressed it with my distress inks.  Using a burlap-wrapped toilet paper roll, I placed it behind my fence to use it like a table.  I adhered several small bottles and added some fake grass and flowers.


I also sprayed some cheesecloth . . . then added that and a small book & tag from UmWowStudio Oct. 2012 kit.  Added a few more drops of spray and I was done.

Thanks so much for stopping by today . . . now to the other important stuff . . . . a $20 gift certificate to VLVS from ME!!!  To be eligible, become a follower (if you aren't already) and leave a comment that you did so.. You have till Saturday, Nov. 2nd to be eligible.  I will draw a name on Sunday and announce the winner on Monday, Nov. 4th.  Good Luck!!!

Till the next time I'm up in the night.  Kathy

Challenge(s) entered:
Alphabet Challenge Blog - "S" is for Scary
Always Something Creative - Fall or Halloween
Artistic Inspirations - Anything Goes
Craftin Dessert Divas - Halloween linky party
Crafts 4 Eternity Recipe Challenge - Happy Halloween
Crafty Boots - Halloween
Crafty Hands Challenge - Anything Goes
Creative Craft Challenges - Anything Goes
Creative Inspirations Paint - Anything Goes
Creative Moments - Anything goes / use lace
Delicious Doodles Challenges - Halloween/Something Scary
DLArt Thankful Thursday - October Linky/Anything Goes
Dorcerela Creations - Challenge #48 Anything Goes
Feeling Crafty Challenge - Autumn or Autumn colors
Flourishes - Fussy Cutting (I fussy cut around my 
stamped image, then adhered it to script paper)
Hanna and Friends - Anything Goes
Heck of a Challenge - Autumn colors
Left of Center Creative Challenges - Halloween or Creepy
Make It Monday - Anything Goes
My Craft Creations - Anything Goes
One Crazy Stamper.com - Thankful / Autumn colors
Paper Crafting Journey - Anything Goes
Penny Black and More Challenge - Anything Goes
Rhedd and Roses - Anything Goes
Scrapbook Stamp Society - Anything goes / Halloween
Stamping for the Weekend - Something spooky
Sweet Stamps - Tags
Through the Craft Room Door - Anything Goes
Use It Tuesday - Creatures (the bats I have had for over a year)
2 Creative Chicks - Halloween
2 Creative Chicks- Halloween Linky Party
Crafty Girlz Challenges - Anything Goes


Thursday, October 24, 2013

Winner, winner . . .

who wants a chicken dinner???

Okay, not a chicken dinner, but how about the $20 gift certificate from VLVS from my October Guest Designer project on October 11th???

{{{drum roll please}}} 

 . . . . and the winner is . . . 

Roberta Swisher

"Hello from your 101st follower! I'm also one of your newer HIMCR teammates.  Your project is phenomenal! I would say that taking your definitely works for you....just think of it as being deliberate, not slow. That's always my own story!  Thanks for the chance to win some yummy candy."

Congrats, Roberta!!!!  Please contact me either at Clayton528@aol.com or on Facebook . . . and I'll get you gift certificate to you.

For those who did not win but would like another chance, checkout my project that will go LIVE tomorrow, Friday, October 25th, for another chance to win another $20 gift certificate to VLVS. :)

Till the next time I'm up in the night.  Kathy


Tuesday, October 22, 2013

Mid-Challenge Inspiration - Halloween!

Hi, all my crafty friends and family!!!  


What a week this has been . . . and is starting to be that way again!  Busy, busy, busy . . . and here I am down with the flu, I think.  Been bowing to the porcelain god since Saturday , which at that time I thought it was a migraine because I felt so much better after a 3-hour nap.  

Then today it hit me FULL force!!!

I just work up (around 10:30pm Monday), realizing I had not scheduled a post for today's (Tuesday) Mid-Challenge inspiration.  So here I am, with a 7-up in one hand and typing with the other. lol  (I'm giving you the "pretty" picture of what I look like right now because you really do NOT want to know how I truly look like---LOL). :)

But enough about my wooos (or however you spell it) . . .  I am here today to to remind you that you still have two (2) weeks to complete a project for Clear It Out Challenge.  The theme is Halloween and the stash item is something ORANGE.  Here's a little card I put together:


This little cutie is "Witch's Corner" from Digi Darla.  Isn't she so sweet?


Now that I hopefully inspired you to do a little something yourself, I want to remind you again that you still have 2 weeks to get your project in to Clear It Out Challenge because since there are five (5) Tuesdays this month, this challenge was for 3 weeks, instead of two (2). Yay!!!  

So what are you waiting for?  Let's get crafting!!!

Well, I am actually going to drink a bit more 7-up and go back to bed . . . and hopefully, I will feel better tomorrow.  Though if this is what has been going around, it will probably be Wednesday before I'm starting to feel better. Booooo!


Till the next time I'm up in the night 
(and not bowing to the "pg" -- lol).  Kathy

Challenge(s) I want to enter:
Crafty Boots - Halloween

Monday, October 21, 2013

Bee Happy! --- Get Inky! Challenge #15


Happy Monday, to all crafty friends and family !!! 

I am here today with some inspiration for you.  But first, I want to tell you some exciting news . . . I was asked a week ago if I would like to be a guest designer for Get Inky! Stamps thru to the end of the year.  How exciting is that?!?!   I am so excited and honored I am to have been asked to be a Guest Designer for Get Inky! Stamps.  So THANK YOU, Thia, for this wonderful opportunity!!!

As many of you know, I just LOVE Get Inky! stamps . . . they are so versatile and so cute!!!  And because they are so versatile, I was able to use the "Buzzing Bees" stamp set on a fall card for this week's challenge on Get Inky! Challenge blog. (NOTE:  Make sure to read to the end to see how you can be eligible to win a $15 gift certificate to Get Inky! Stamps from ME . . . just a little something to say "Thanks!")

Okay, on to the challenge . . . the current challenge on the Get Inky! Challenge blog is a Fall or Halloween card with buttons.  At first, I was unsure what I was going to do because I don't have the Get Inky! Stamps "Halloween Spooktacular 2013" stamp set (it is actually the only one I do NOT have . . . BUT it is on it way as we "speak" right now -- lol).  But then as I was looking out at my flowers, a light bulb went on . . . I saw some bees just buzzing around . . . going from flower to flower, collecting the pollen so they can make honey and store it up for the winter, and being a "country" girl, I knew this was something they do every FALL to get ready for winter.  

So there I had it . . . I was going to use my "Buzzing Bees" stamp set for my card.  


And like most of you, I needed more "generic" cards for my card stash, so I decided to keep my card CAS (clean and simple) card.  In addition to my stamping, I used Marigold and Charcoal twine from the Twinery, wrapping it around the top-middle part of the card twice and folded up the bottom corner of the front of the card and attached a button.  I also used a little bit of "Frosted" Stickles on the wings of my bees to give them a little something.

Remember, the current challenge at Get Inky! was doing a card with a Fall or 
Halloween theme . . . with buttons as the a twist.


Earlier I mentioned a $15 gift certificate to Get Inky! Stamps from ME as a "Thank You!".   To be eligible, you need to become a follower (if you aren't already) and leave a comment you did so.  You have till Monday, Nov. 4th, to do this . . . I will randomly draw one (1) name and announce the winner on Wednesday, Nov. 6th.   

Thanks so much for stopping by to see what I've been up to!!!

Till the next time I'm up in the night.  Kathy


Saturday, October 19, 2013

HIMCR #120 - Color It!

Hi, all my crafty friends and family!!!

It's the 3rd Saturday of the month and do you know what that means?  It means it's time for the "Color It" Challenge on Hiding In My Craft Room.  Remember you have one week to submit your projects on HIMCR to be eligible for a Copic Fusion set . . . YES, you read that correctly!!!  A Copic Fusion Set  . . . GREAT prize, isn't it?!?!?  So get out your paper and glue and let's see what you can come up with. :)

 Here's a card I did to give you a little inspiration to help get you going:


The stamp is "Seed Catalog" by Stampendous . . . and it is so much fun to color with so many different options.  I decided to do something a little different with this image . . . I decided to do a "telescope" technique.  Instead of coloring just one (1), I colored two (2) images identical. 

Then I took a set of dies (4 of them) and placed them on one of the images . . . this is to help me see where they need to be.  I placed tape on alternating ones . . . for the 1st images I placed the tape on the 1st die and the 3rd die Then removed the other two dies (the 2nd and 4th) and ran it thru my Big Shot. 


Setting that set aside, I did the same thing with the 2nd image . . . only this time I taped the 2nd and 4th die before running thru my Big Shot.  (Remember to place all 4 dies on the image to make sure you are cutting the image in the EXACT same spots as the 1st image . . . otherwise they will not line up correctly when putting all four (4) together.


After cutting both images, I layered them . . . alternating the 1st image set and the 2nd image set and making sure the stamped images lined up with each other.  I used foam tape in between each layer. 


It is such a FUN way to add some a little "different" to your card.  Is there something "different" you do to your cards once in awhile to give them a different look?

Till the next time I'm up in the night.  Kathy

Tuesday, October 15, 2013

Clear It Out Challenge - Halloween

Does anyone know what time it is?


That's right . . . 

It's CHALLENGE time!!! 


Once again, it's challenge time over at Clear It Out Challenge.  Time to roll up those sleeves, get out your markers and get your crafty on.  And usual, our A-M-A-Z-I-N-G leader, Laura,  has come up with an awesome challenge this time . . . so easy, peasy!!! 

 Are you ready???

I didn't hear you . . . 

Are you ready???


Okay, it's challenge time!!!

Theme:  Halloween
Stash:  Something Orange

You have 3 weeks to play (till Nov. 4th)

Our sponsors this challenge are:


For this week's challenge, I picked out an adorable witch digi stamp called "Lucy Witch" by designer Reeces Scrap Pieces for Stitchy Bear Digi Outlet.  They have many different designers to choose from, each having their own unique style. . .  and I just fell in love with "Lucy Witch".   Here's how my card turned out:

Copics used:


Isn't she just adorable?  In addition to my Copics, I also used "Apothecary" paper collection by Echo Park, orange dew drops, and Black Diamond Stickles (on the spider) . . . oh, I also used Helmar's Scrap Dots for my saying since it would have been uneven due to the height of all the layers of paper under the image. 

So now that you have seen what I did for this challenge, what are you waiting for?  Go grab your supplies and join in on the fun!

Till the next time I'm up in the night.  Kathy

Here's some other challenge(s) I've entered:
Crafty Boots - Halloween
Sweet Stampin Challenge -  Halloween
Kitty Bee Designs -  Halloween
Left of Center Challenges -  Orange and black

Friday, October 11, 2013

VLVS! October Guest Designer

If you are here from Clear It Out Challenge, click HERE for Mid-Challenge Inspiration.

If you are here from Hiding In My Craft Room, click HERE for Challenge #118-Halloween Colors


Hi, all my crafty friends and family!!!  A few months ago, I was asked if I would like to be a Guest Designer in October for VLVS! (VivaLasVegas Stamps!) . . . one of my all=time favorite stamp companies.  I, of course, said, "YES!".  So today I am here wanting to share with you a mixed media layout I did for my 1st post for VLVS!.  I am so excited (and more than a little nervous) to be a Guest Designer for VLVS!.  I mean, I have seen what their designers have done . . . and they are so A-W-E-S-O-M-E and so inspirational.  I just hope I don't trip in their shoes while I am at it. lol 

Oh, one more thing before I start, at the end of this post will be instructions on how to win some AWESOME blog candy (a $20 gift certificate to VLVS!) as a celebration for my first Guest Designer post for VLVS!..  So stay turned . . . I will try to hurry thru this post. :)

For my project, I decided to do a mixed media layout.  This is one of the first times I have done a layout like this.  (Okay, to be honest, it is actually the 4th one I've done in the past week or so and I LOVE it!).   


For this layout, I got my inspiration from one of my favorite designers, Czekoczyna I used a few of my favorite VLVS! stamps along with one of my daughter's favorite colors . . . PINK! I also used a picture she took of herself and sent it to me . . . okay, I "borrowed" it from her Facebook page. But, hey, I need to take advantage of getting all the pictures of her I can since she does NOT like to have her picture taken. :)

I used the following VLVS! products:
Chicken Wire (Item #5757)
Pure imagination (Item #19041)
Be an ADVENTURER (Item #19173)

Other items:
UmWowStudio flair, May Arts lace and jute, black Archival Ink,
 misc. washi tape, various patterned cardstock from Basic Grey,
 Prima & Pink Paislee, gesso, Glimmer Glazes & Mists from Tattered Angels,
  masks from Prima (dots & checkerboard), assorted flowers; 
a stick pin (I made this for a swap I was in), rub-ons & a key from Tim Holtz, 
chicken wire chipboard from Dusty Attics (Oops! Sorry, DeeDee) 
and black drawing ink

Since this was a long process (as least for me since I am so slow . . . okay, I am undecided about some things so I take my time --- that's my story and I'm sticking to it. lol), I am only going to highlight the most important parts.  As with any mixed media project or layout, I taped some Super Stock or chipboard behind the cardstock I am using . . . this was to help stiffen it so it wouldn't buckle under the weight of all the embellishment. 

Using Helmar 450 Quick Dry Adhesive, I adhered strips and squares of different papers (it is important to use a liquid adhesive for this first part so the paper doesn't wrinkle as much).  Once I had my paper down in an assortment that worked with the picture I was using, I added some washi tape.  Then I applied gesso over it and added small clusters of checkerboard throughout.


I then added my picture using foam tape. (I did cover my photo with a blank piece of cardboard as not to get ink or glue on it . . . I just wanted it there to help with placement of my flowers and such). Then I started adding clusters of flowers to the top & bottom right of my picture and to the bottom right of my layout, pieces of chicken wire chipboard, lace, and rub-ons.  Then starting with the lightest mist/glaze and working to the darkest mist/glaze, I went to work misting and dripping till I was happy with the results . . . I let some dry completely before adding the next color and some I did not.  This was to get a more "blended" look.  Also, the reason I to go from lightest to darkest is because you can still see the lightest color after applying the darkest color . . . but you can't see the lightest color if added after the darkest color.  I added some jute, a stick pin I made with a dragonfly charm on it and a key to my clusters of flowers.


Once I was finished with all the adhering and misting, I stamped my VLVS! images here and there.  I added the chicken wire stamp in various places around my photo and lower flower cluster. Stamped "Pure Imaginationbelow my photo and stamped "Be an ADVENTURER" to the right of my photo . . . I ended up trying to double stamp it, trying to "shadow" it, but it didn't quite work the way I wanted.  But I am happy with it anyway....as I always say, "There are NO mistakes, only creative discoveries . . . nothing is right or wrong."

Added some bling and some droplets of black drawing ink and VOILA! I was done.


Thanks so much for stopping by.  I hope I was able to inspire at least one person today . . . if I did, my world is complete (well, at least for today it is - lol).   I can hardly wait to share my 2nd project in a couple of weeks.

Now for the other important part . . . blog candy (a $20 gift certificate to VLVS!).  To be eligible, become a follower and leave a comment stating you did so or just some lovin' . . . please keep the comments clean.  Inky is okay, but not dirty. ::) You have until 11:30pm Central Thursday, October 17th to leave your comment(s). I will announce the winner (from a random drawing) on Friday, October 18th.  If my number of followers increase by 25, I will add another blog candy (yet to be determined but will have a $20 value).  So please check back on Friday, October 18th to see if you are the one. 

Till the next time I'm up in the night. Kathy


Tuesday, October 8, 2013

Mid-challenge Inspiration - Thanksgiving

If you arrived here from Hiding In My Craft Room #118 - Halloween Colors, click HERE.

Hi, all my crafty friends and family!!!  What a week this has been . . . and is going to be!  Just got back from a 4-day scrapbooking retreat for "Scrappin' For Our Soldiers" where ALL proceeds are used to get phone cards and care packages for our soldiers.  How perfect is that?  I will be going to another one in January along with another scrapbooking fundraiser for a family whose 23-year old mother and 3-year old daughter are both fighting cancer.  The mother was diagnosed with an aggressive form of breast cancer while pregnant . . . they had to deliver the baby early so she could start treatment (the baby is fine, by the way). And the daughter has been diagnosed with a terminal brain tumor.  In my opinion, what better way could I spend my scrapbooking allowance?  For those who know me, know that I will help anyone who is fighting a battle like this because because it hits close to home.  If you want more information, please leave a comment here or on Facebook and a way to get a hold of you so I can get the information to you. 

As for the rest of the week, it's going to be busy, busy with projects.  One of which you will see whey you check back on Friday, October 11th for a surprise . . . I was asked to be a Guest Designer  for an A-W-E-S-O-M-E stamp company and the only way to find out who si to check back. :)

But enough about enough about me and what I've been doing this past week.  I am here today to to remind you that you still have a week to complete a project for Clear It Out Challenge.  The theme this time is Thanksgiving . . . and the stash item is a leftover sentiment from other projects.  And what a perfect time to remember what we are thankful for . . . I know after hearing about the mother/daughter reminded me just how thankful I am to be here.   And since I am still here, here's a little inspiration to hopefully help you with your CIO project:

Copics used:
B93, B97 (dress/hat)
YR23, YR24 (straw)
E95, YG63 (patches on hat & apron)
E00, E21, R20 (skin/face)
YG63, YG67 (grass & corn)
YG11, G24 (eyes)
Y15, Y18 (sunflower & corn)
Y17, Y28 (wheat)
E43, E44, E47 (fence)
R24 (heart patch)
E43, E44, E47, E49 (hair)
B0000, B000, B10 (halo/sky)

The image I used is "Maddie the Scarecrow" from Lacy Sunshine . . . isn't she just adorable? I knew I just had to use her when I was looking thru Lacy Sunshine's digi stamps. :)  I used a leftover stamping image from some cards I made this two (2) weekends ago . . . boy, was I glad I ended up with extra because I was having a hard time trying to find a sentiment I could use for this challenge.  And I used "All Hallow's Eve" paper collection from Carta Bella. All-in-all, once again I am pretty happy with the way it turned out.  What do you think?

Till the next time I'm up in the night.  Kathy

PS  Remember to check back on Friday for my surprise Guest Designer post. . . . and a giveaway of some blog candy. :)


Saturday, October 5, 2013

HIMCR #118 - Halloween Colors

Hi, all my crafty friends and family!!!  A few days ago, I mentioned to check back today because I would have some super duper exciting news to share with you.  So here it is  . . . As of October 1, 2013, I became a member of another ultra-super fun Design Team for Hiding In My Craft Room (what a GREAT name!!!) and today is my first posting/project for HIMCR. I was so excited when I got the invitation from Laurie saying I had been accepted that I can't even put it into words on how I felt and still feel.  I am so honored.  With this design team, there will be weekly challenges . . . actually, each Saturday of the month-- 

1st Saturday: A Color Challenge
 2nd Saturday: Super Scraps Saturday !
 3rd Saturday: Try a Technique Week
 4th Saturday: Mix it Up!
 5th Saturday: Freestyle!

--and each will have a different theme.  Like for today (the 1st Saturday of October), the color(s) are Halloween Colors.  How fun is that!!!  And next week (2nd Saturday of October-the 12th) is Super Scraps where we use our scraps, but we also have some super exciting goodies to use from a sponsor. And so on and so forth . . . so keep checking in every Saturday to see what I've been up to while Hiding In My Craft Room and join in on the fun!!! (For more details about Hiding In My Craft Room, the challenges and how to participate in them, click HERE.)

As I said earlier, this week's challenge is to use Halloween Colors with the prize being a fun Halloween bundle.  When I think of Halloween, I think of browns, black, orange, lime green, yellow and purples.  So with so many options in colors and because my creativity was on a roll this week, I ended up doing two (2) projects this week. (Actually, I did 4, but am only going to post 2. . . . as I said, my creativity was on a roll.)

For my first project, I did a layout of my daughter after her participating in Blue/White game night . . . it was a game that was to be during Homecoming, but due to rain it was postponed to this past week. These game(s) involved tug-a-war with pudding, paint from "something", and all sorts of other "fun" & slimy things.  She had a BLAST!!!  Here's how the layout turned out:


As you can see, she did have fun and did get quite MESSY!!!  :) I used up a bunch of scraps for this layout, some rhinestone bling from Freckled Fawn, some Stickles, a little Walnut Stain distress ink and "Voila!" I had the perfect layout for these pictures.

For my next project, I got inspiration from a layout on The Scrapbook Dairies by Adrieanne Ford . . . they have wonderful kits there. I changed it a bit to make it more of my own by using some Tim Holtz & VLVS! stamps; adding a little glass bottle, some butterflies, a stick pin that I made, & twine from The Twinery;adding some arrows; and using Apricot Chalkboard & Copper Glimmer Mists on the flowers.  I also made some more resin flowers by using my Amazing Mold Putty and some plastic flowers I got from Steals.com and painting them with Art Anthology Sorbet Dimensional Paint in Outrageous Orange and Tiger's Eye.  

The picture is one of my daughter that she took of herself with her cell phone while playing around with the effects of her camera on it . . . she was in a tree house while at my brother-in-law's Tree Farm Party.  I was so excited when she sent it to me because as most of you know, she doesn't like to have her picture taken very often, let alone giving me one. :)   Here's how it turned out:


Here's a few close-ups:


I just love the difference in these two (2) layouts . . . both are unique and have a style each their own.  But as I told some of my friends, my style all depends on what type of mood I am in and what type of picture(s) I want to scrap.  And I think each of these layouts worked PERFECT with the pictures I used to go with them.  What do you think?

So now that I hopefully gave you some inspiration, it's time for you to go and hide in your craft room and get creating so you can join in on the fun to with Hiding In My Craft Room.  Remember, you have one (1) week to complete this challenge to be eligible for a fun Halloween bundle.  Have fun!!!

Till the next time I'm up in the night.  Kathy